Wireguard is a modern VPN that employs cutting-edge cryptography. It was originally designed for Linux, but it is now a cross-platform tool that works flawlessly on all major operating systems, including Windows, MacOS, BSD, iOS, and Android.
Wireguard is simple to set up to create own private VPN. It is faster than OpenVPN and other VPN tools because it is built into the Linux kernel. Unlike other VPN tools, the codebase of Wireguard is so small that it can be easily audited by a single person.
It uses cutting-edge cryptographic techniques such as the Noise protocol framework, Curve25519, ChaCha20, Poly1305, BLAKE2, SipHash24, HKDF, and secure trusted constructions. The modern design of wireguard makes the codebase unusually small, resulting in faster communication between server and clients.
In this article, I will show you how to install and configure your own private VPN with Wireguard VPN on Linux. I’m going to use Ubuntu with 8GB of RAM and 4 vCPU for the demonstration. It is more than adequate for home users or small businesses with a few employees.
Now without any further adieu, let’s start the installation.
Create Private VPN with Wireguard
Install Wireguard on Debian, Ubuntu, and Derivatives
sudo apt install wireguardWireguard on Fedora
sudo dnf install wireguard-toolsInstall Wireguard on RHEL
sudo yum install https://dl.fedoraproject.org/pub/epel/epel-release-latest-8.noarch.rpm https://www.elrepo.org/elrepo-release-8.el8.elrepo.noarch.rpmsudo yum install kmod-wireguard wireguard-toolsInstall Wireguard on Arch Linux
sudo pacman -S wireguard-toolsIf you are using another Linux distribution, please visit the wireguard official installation page for the most up-to-date information.
Packet forwarding
Once wireguard is installed, the next step is to enable packet forwarding on Wireguard server. To enable packet forwarding, open and edit /etc/sysctl.conf file.
sudo nano /etc/sysctl.confNow uncomment the following line to enable the setting –
net.ipv4.ip_forward=1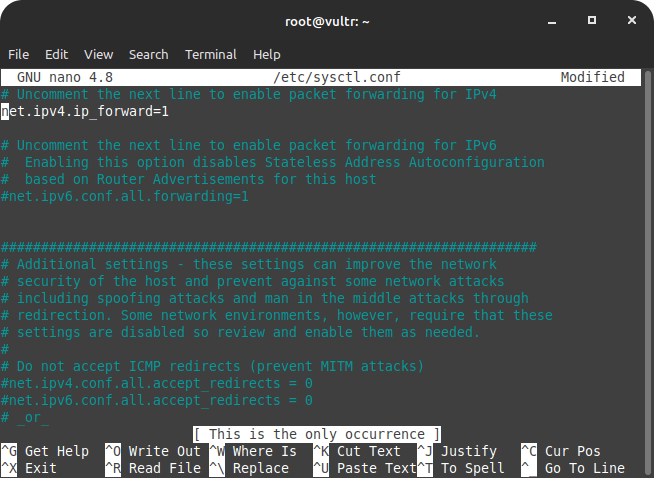
Press Ctrl+X and save the changes.
Now enable the new settings using the following command –
sudo sysctl -p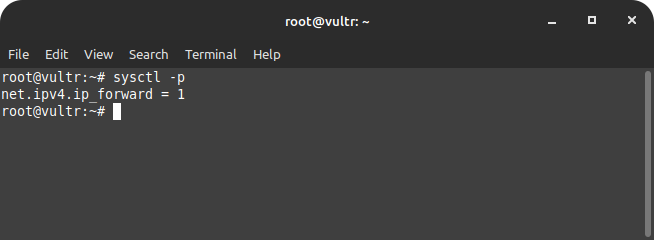
Configure Firewall to allow Wireguard
It is strongly advised to install and configure a firewall on the Wireguard server. A firewall will block all unnecessary ports, and we will only allow access the wireguard communication port, 51820.
Install Firewall
For the demonstration purpose, I’m using UFW firewall. You can use any other firewall and open the port 51820.
sudo apt install ufwAllow necessary ports –
sudo ufw allow ssh
sudo ufw allow 51820/udp
And that’s it. We can now enable the firewall to reflect the above settings –
sudo ufw enable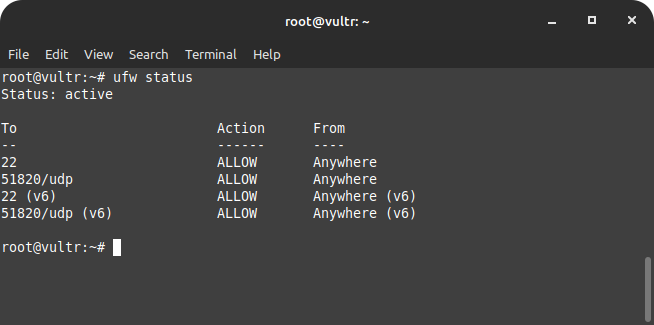
Generate Private Keys and Public Keys
Similar to SSH, Wireguard VPN requires a pair of cryptographic keys to securely communicate between server and clients. Each client has to generate a pair of cryptographic key to connect to the server.
Each client shares its public key with the server and each client has server’s public key. The data encrypted on the server using the client public key can only be decrypted by the client private key. It means never share your private key with anyone.
To generate the private and public keys, cd into the wireguard directory on the server, i.e. /etc/wireguard.
cd /etc/wireguard
umask 077
Generate keys –
wg genkey | tee privatekey | wg pubkey > publickeyOnce keys have been generated, next we need to create wireguard config that’ll store all required data to connect to the wireguard clients.
Create Wireguard configuration
Each clients to successfully conntect to the wireguard server has to share its public key with the wireguard server. Wireguard configuration stores each client’s information.
We need to create wireguard config in /etc/wireguard directory.
sudo nano /etc/wireguard/wg.confNow paste the following in the wg.conf file.
[Interface]
PrivateKey = server-private-key
Address = 10.0.0.1/24
PostUp = iptables -A FORWARD -i wg0 -j ACCEPT; iptables -t nat -A POSTROUTING -o eth0 -j MASQUERADE
PostDown = iptables -D FORWARD -i wg0 -j ACCEPT; iptables -t nat -D POSTROUTING -o eth0 -j MASQUERADE
ListenPort = 51820

[Peer]
PublicKey = client-public-key
AllowedIPs = 10.0.0.2/32We are almost done with the server-side configuration. It’s time to start wireguard and set it to run on server start.
wg-quick up wg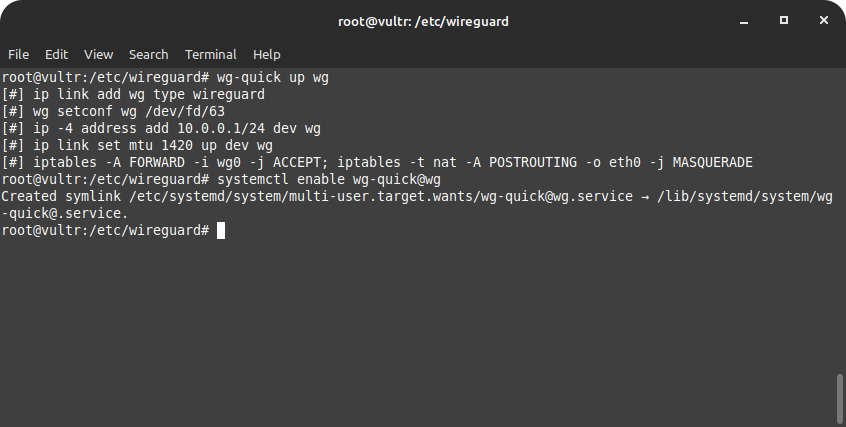
Set wireguard to start automatically on server startup –
sudo systemctl enable wg-quick@wg10 Steps To Secure Linux Server + {Bonus Tips}
Linux servers are already extremely secure by default; that’s why 100% of supercomputers, most of the top 1 million servers, and top 25% of websites on the internet run on Linux. Besides having security tools in place, users should follow a few steps to further secure Linux servers.
Configure Wireguard client
I’m assuming you have Wireguard installed on your client. Please visit the official installation page with the most up-to-date information for installation instructions specific to your device.
Once you’ve installed Wireguard on the client, we need to generate keys and create config just as we did during the server’s configuration.
Inside /etc/wireguard/ generate the keys using the following command –
cd /etc/wireguard
umask 077
Generate private and public keys –
wg genkey | tee privatekey | wg pubkey > publickeyCreate wireguard config on client –
sudo nano /etc/wireguard/wg.confNow paste the following in the wg.conf –
[Interface]
Address = 10.0.0.2/32
PrivateKey = client-privatekey
DNS = 1.1.1.1

[Peer]
PublicKey = server-publickey
Endpoint = server-public-ip:51820
AllowedIPs = 0.0.0.0/0, ::/0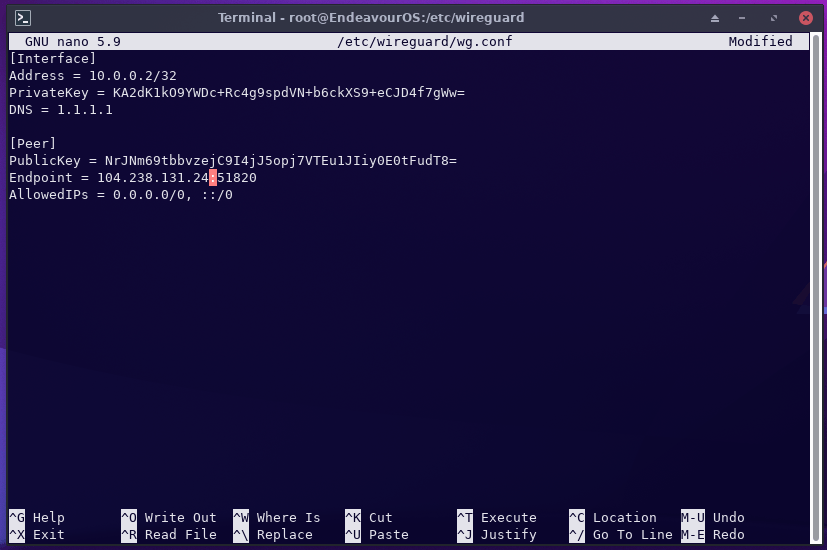
sudo cat /etc/wireguard/publickey <= Run this command on serversudo ifconfig <= Run this command on serversudo cat /etc/wireguard/privatekey <= Run this command on clientCopy the public key content from the client and paste it in the server’s wg.conf file.
Start Wireguard on client and set it to run on system startup –
wg-quick up wgAutomatically run on system startup –
sudo systemctl enable wg-quick@wg9 Steps To Prevent Phishing Attacks
Internet pirates steal personal financial information using a new sort of Internet piracy known as “phishing,” which is pronounced “fishing,” and that is exactly what these hackers are doing: “fishing” for your personal financial information.
Adding more Wireguard clients to the server
In the above server configuration, we added one wireguard client. We can add as many clients as we want by including the following line in the Wireguard configuration file /etc/wireguard/wg.conf.
Open the wg.conf file –
nano /etc/wireguard/wg.confAdd the following variables in the configuration –
[Peer]
PublicKey = client-pulickkey
AllowedIPs = 10.0.0.3/32Conclusion
That’s the end of it. You can ssh out of the server after starting and enabling the wireguard to run on system startup. Check the server frequently for any available updates.
Wireguard is the best VPN. You set it up on your own server, ensuring that no one ever has access to your data. No matter how popular a VPN service is or how much it brags about protecting its users’ privacy, it may share its customers‘ data if authorities or a court request it. So it’s best to run your own VPN server to protect your information.
Frequently Asked Questions
What is a private VPN used for?
How much does a private VPN cost?
Top Private & Secure Email Providers in 2023
When it comes to email providers, some popular names that come to mind are Gmail, Microsoft Outlook, Yahoo Mail, iCloud, and so on. In this article, I will discuss the top private and secure email service providers in 2023.
